
Immersive rooms have the unique ability to take people anywhere they can imagine, without them having to step outside the door. Whether you want to stand at the edge of a volcano, walk through a rainforest, or explore a city skyline, an immersive room can make it happen.
They’re used in schools, museums, healthcare, corporate training, hospitality and more to deliver unforgettable experiences. The combination of visuals, sound, scent, lighting, movement and atmosphere creates a multi-sensory environment that can be calming, stimulating or inspiring.

Step 1
Define Your Purpose
Before you start choosing equipment, think about what you want your immersive room to achieve.
- Education: Will it be used for curriculum learning, storytelling or interactive lessons?
- Wellbeing: Do you want it to be a calming retreat or a stimulating environment for engagement?
- Training: Will it be a hands-on space for simulations and practical skill development?
- Entertainment: Are you aiming for fun, excitement and memorable shared experiences?
Your purpose will guide your design choices.
Step 2
Choose the Ideal Space
Even modest-sized rooms can become spectacular when designed well. Keep these practical points in mind:
- Shape and layout that works for projection, seating, and movement.
- Controlled lighting like backout shades or dimmers to make visuals stand out.
- Accoustic sound insulation to keep experiences focused and uninterrupted.
- Easy access for all users, such as smooth flooring and inclusive seating options for mobility aid.
Step 3
Select Your Key Features
A great immersive room uses multiple senses to create a believable environment. Popular features include:
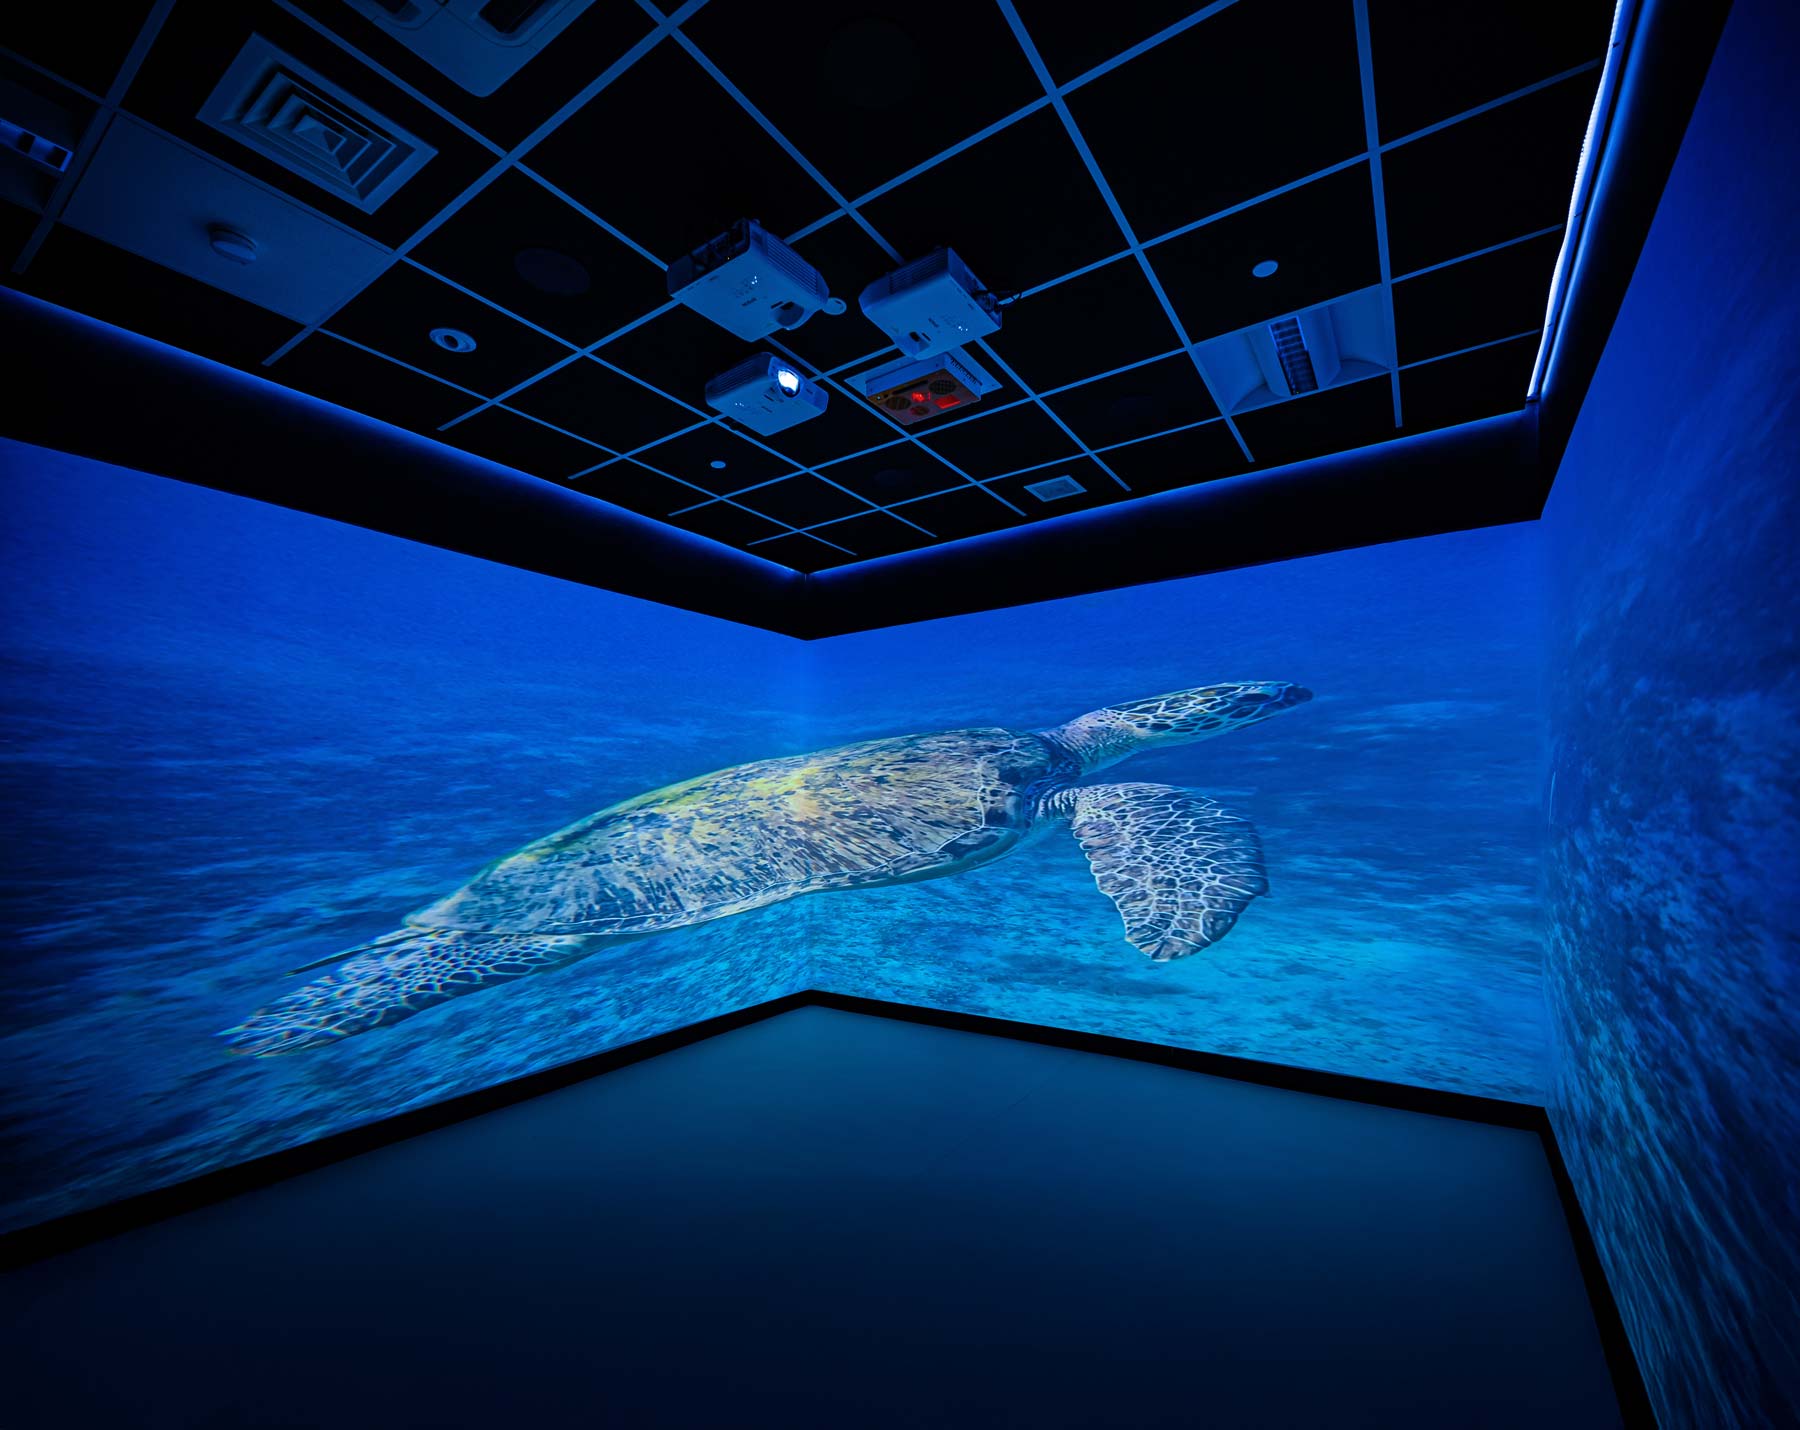
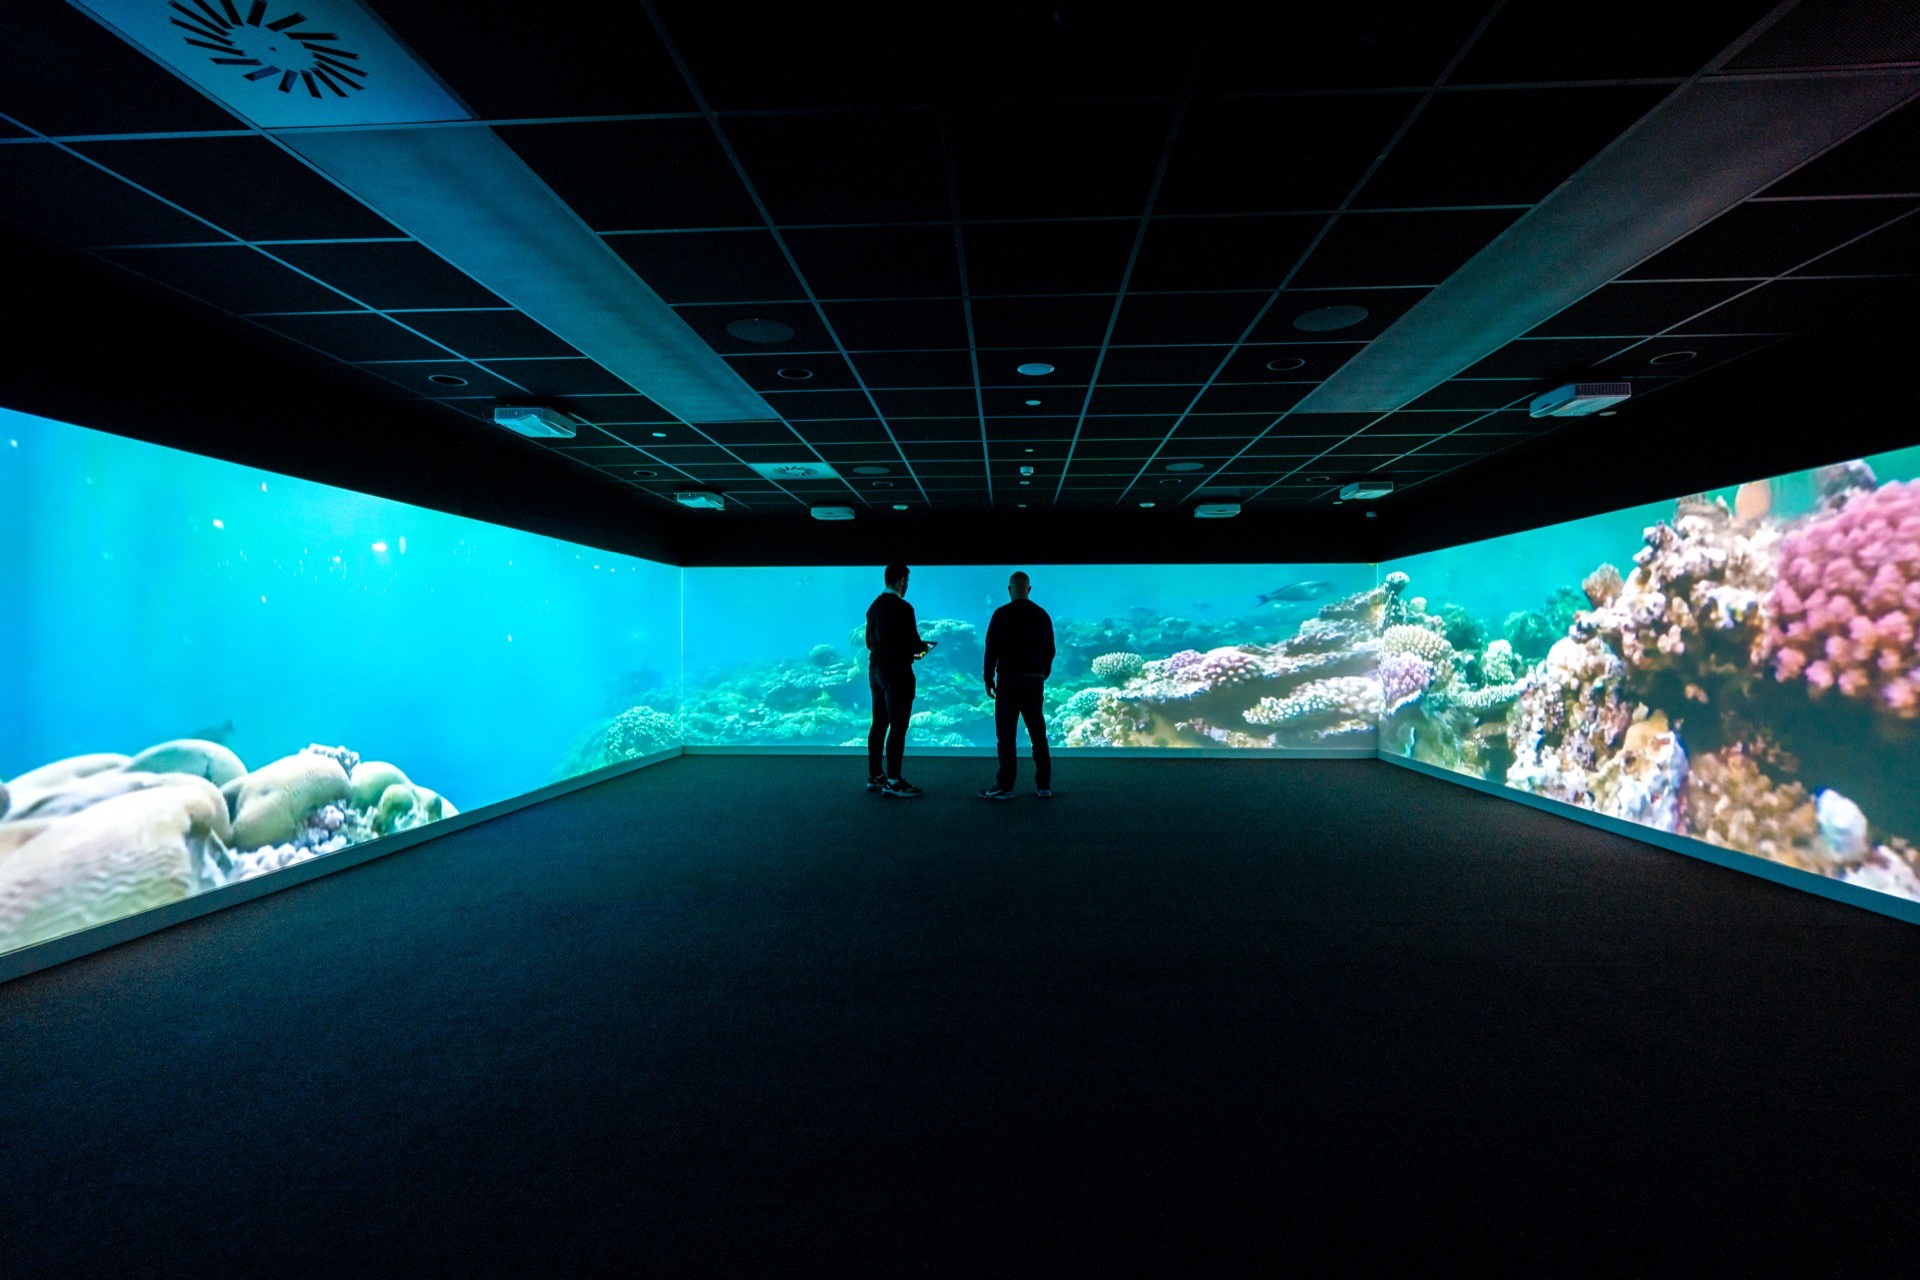
- 360-degree projection: Crisp, full-wall visuals that surround and immerse.
- Interactive floor projection: Games and activities like Wizefloor that respond to movement.
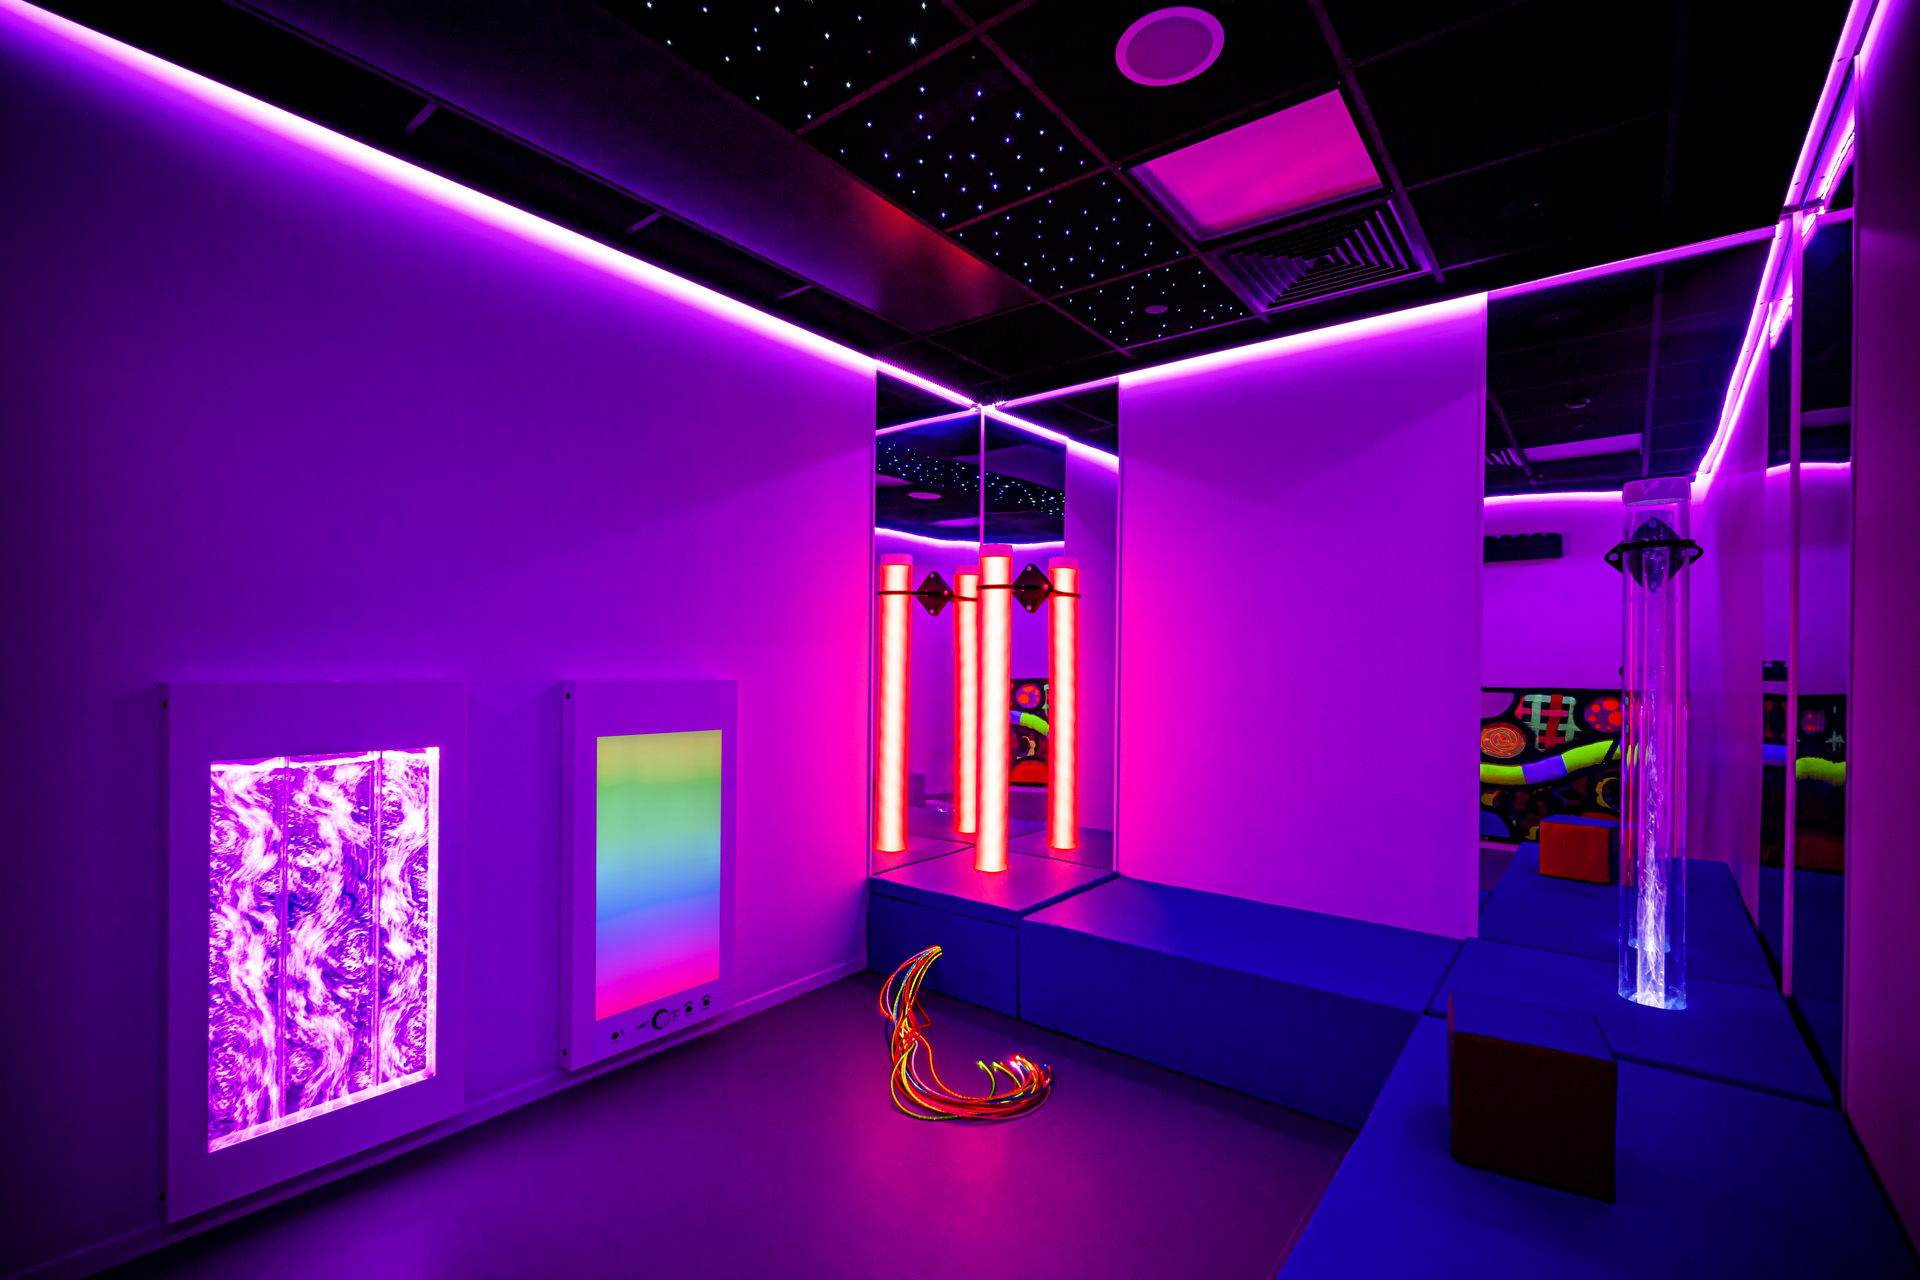
- Dynamic lighting: Extend visuals beyond the walls into the room.
- Audio system: High fidelity sound for music, effects and narration.
- Scent diffusion: Introduce aroma like Aurora Scent to match the experience.
- Wind machine: Add movement and atmospheric effect.
- Underseat or underfloor vibration: Feel every rumble and impact.
- Smoke machine: Enhance lighting effects and drama.
- Padded seating: Add comfort for longer sessions.
Step 4
Make It Inclusive
Immersive rooms can be enjoyed by everyone when they’re designed with accessibility in mind. This could mean:
- Wheelchair-friendly layouts.
- Adjustable volume and lighting levels.
- Content that works for different ages and abilities.
- Clear, simple controls for staff.
Step 5
Integrate It Into Everyday Use
An immersive room shouldn’t just be for special occasions. The more it’s used, the greater the impact. Schools might use it for lessons, assemblies and clubs. Care settings could use it for reminiscence therapy, group activities and relaxation sessions. Businesses might use it for training, presentations and team-building.
Step 6
Measure Success and Keep Improving
Once your immersive room is in use, gather feedback from staff, visitors and participants. Ask what they enjoy, what could be improved, and what new content they’d like to see. This helps you get the most from your investment and ensures the room continues to excite and inspire.
Ready to get started?